

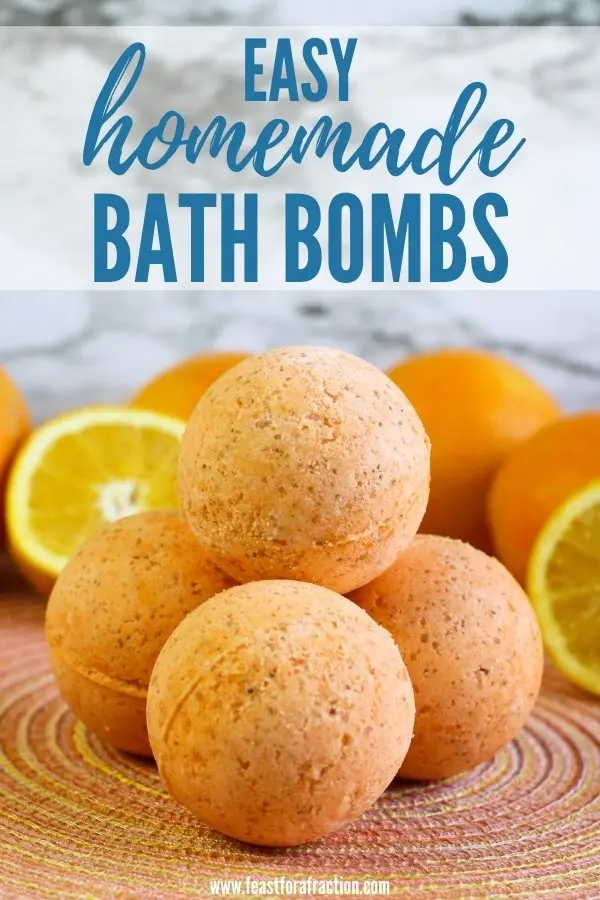
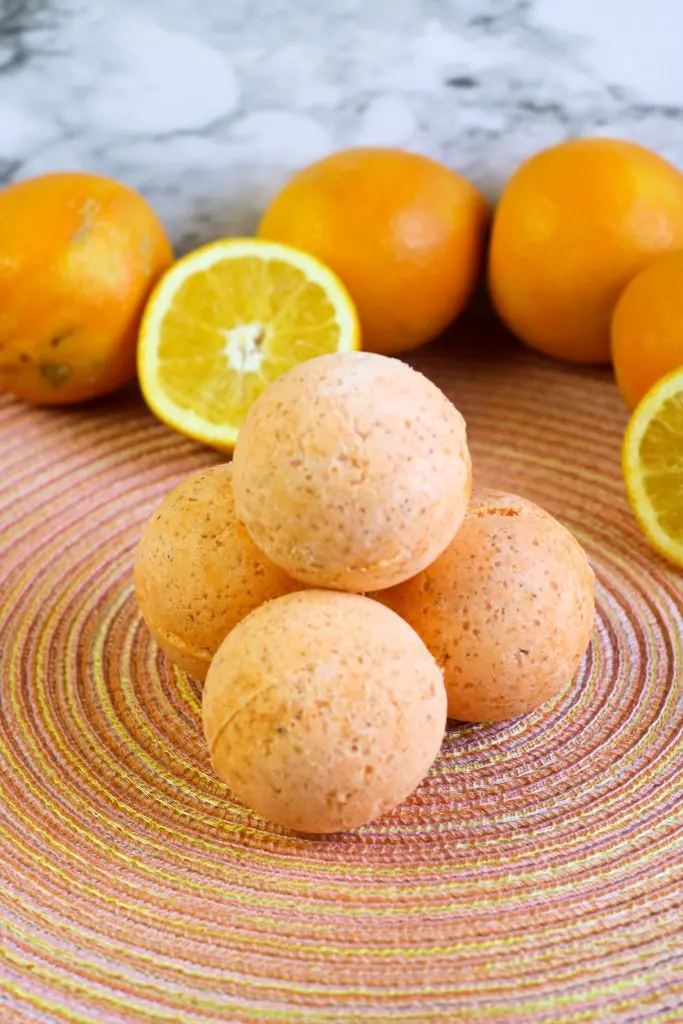
Homemade bath bombs are a fun, easy treat that you can enjoy yourself or make as a gift. Using common, budget-friendly ingredients, I’ll show you how to make these DIY Bath Bombs at home. They’re a fun project to make with kids, too!
As an Amazon affiliate, I earn from qualifying purchases.
Bath bombs have become a hugely popular product to brighten at-home self care. They make bath time fun for kids and relaxing for adults. This DIY bath bomb recipe allows you to enjoy the luxury at home without the expensive price tag.
Most of the ingredients in bath bombs can be found in your kitchen already. If not, they are ingredients that you should stock up on because they can be used in MANY other recipes and applications around the house.
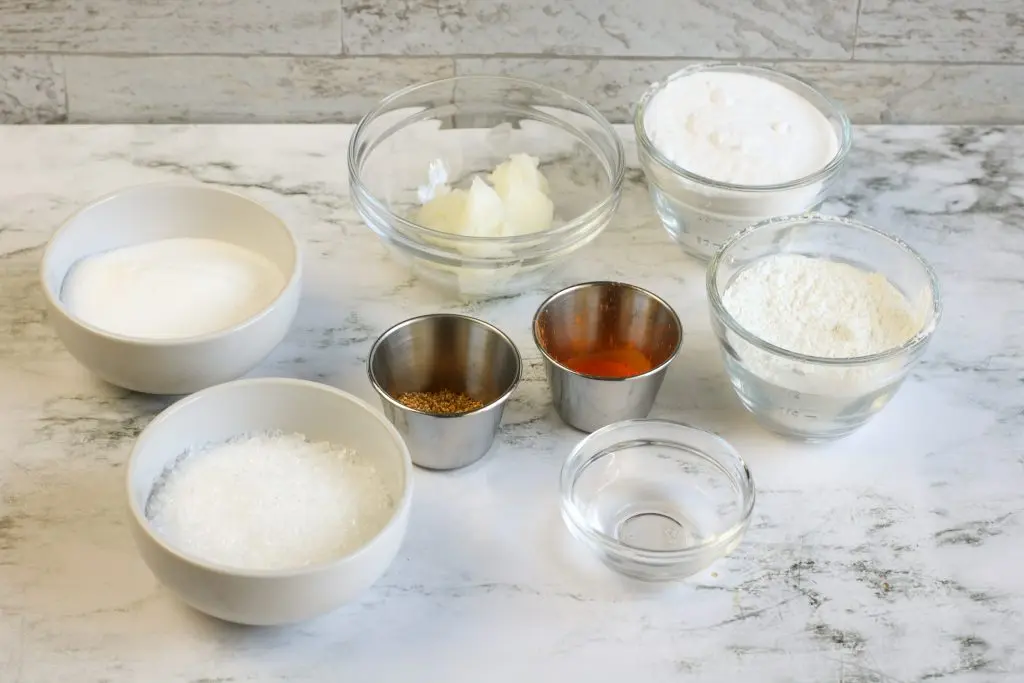
Ingredients to Make DIY Bath Bombs
Dry Ingredients
Corn Starch: Corn starch is found in the baking aisle.
Citric Acid: Citric acid is a natural ingredient made from citrus fruit. This, mixed with the baking soda, is what makes the bath bombs fizz.
Epsom Salt: Epsom salt is the common name for magnesium sulfate. You can find it online or in the pharmacy section of your grocery store. It is wonderful as a soak for sore muscles.
Baking Soda: Baking soda can be found in the baking section of your grocery store. I prefer to buy it in bulk because it has so many uses around the house from cleaning your garbage disposal, eliminating odors, and even in cleaning laundry. It also helps make the bath bombs nice and fizzy.
Mica Powder: Mica powder is a natural soap colorant that is safe for use in bath bombs. We do want to use the least amount possible, though, to obtain the color you want in your bath bombs. It is also completely optional in this recipe. Also, feel free to use any color you like.
Dried Orange Peel: To make dried orange peel, zest three oranges and allow the zest to dry, in a single layer, at room temperature for two days. You can also find it in the spice section of your grocery store.
Wet Ingredients
Essential Oils: Essential oils are optional, but they add a lovely scent to your bath. Feel free to skip them if you are sensitive to fragrances or make sure that you use an oil that is safe for use on the skin. I have chosen to use Orange essential oil in this recipe, but you can use any oil you wish. Lavender or Tea Tree oil would be wonderful.
Coconut Oil: Coconut Oil is the liquid that will hold the bath bombs together. Warm it so that it is a liquid. You can also use Almond oil.
Water: Feel free to use regular tap water.
Equipment
- Large Bowl
- Small Bowl
- Measure cups and measuring spoons
- Whisk
- Rubber Scraper
- Bath Bomb Molds
How to Make Homemade Bath Bombs
- Measure out all of your ingredients. Choose what color mica powder (optional) you would like to add to your bath bombs, which essential oils you would like, and if you want to add any dried ingredients such as orange peel or dried lavender. If you’re sensitive to fragrances, you can leave out the essential oils and color all together.
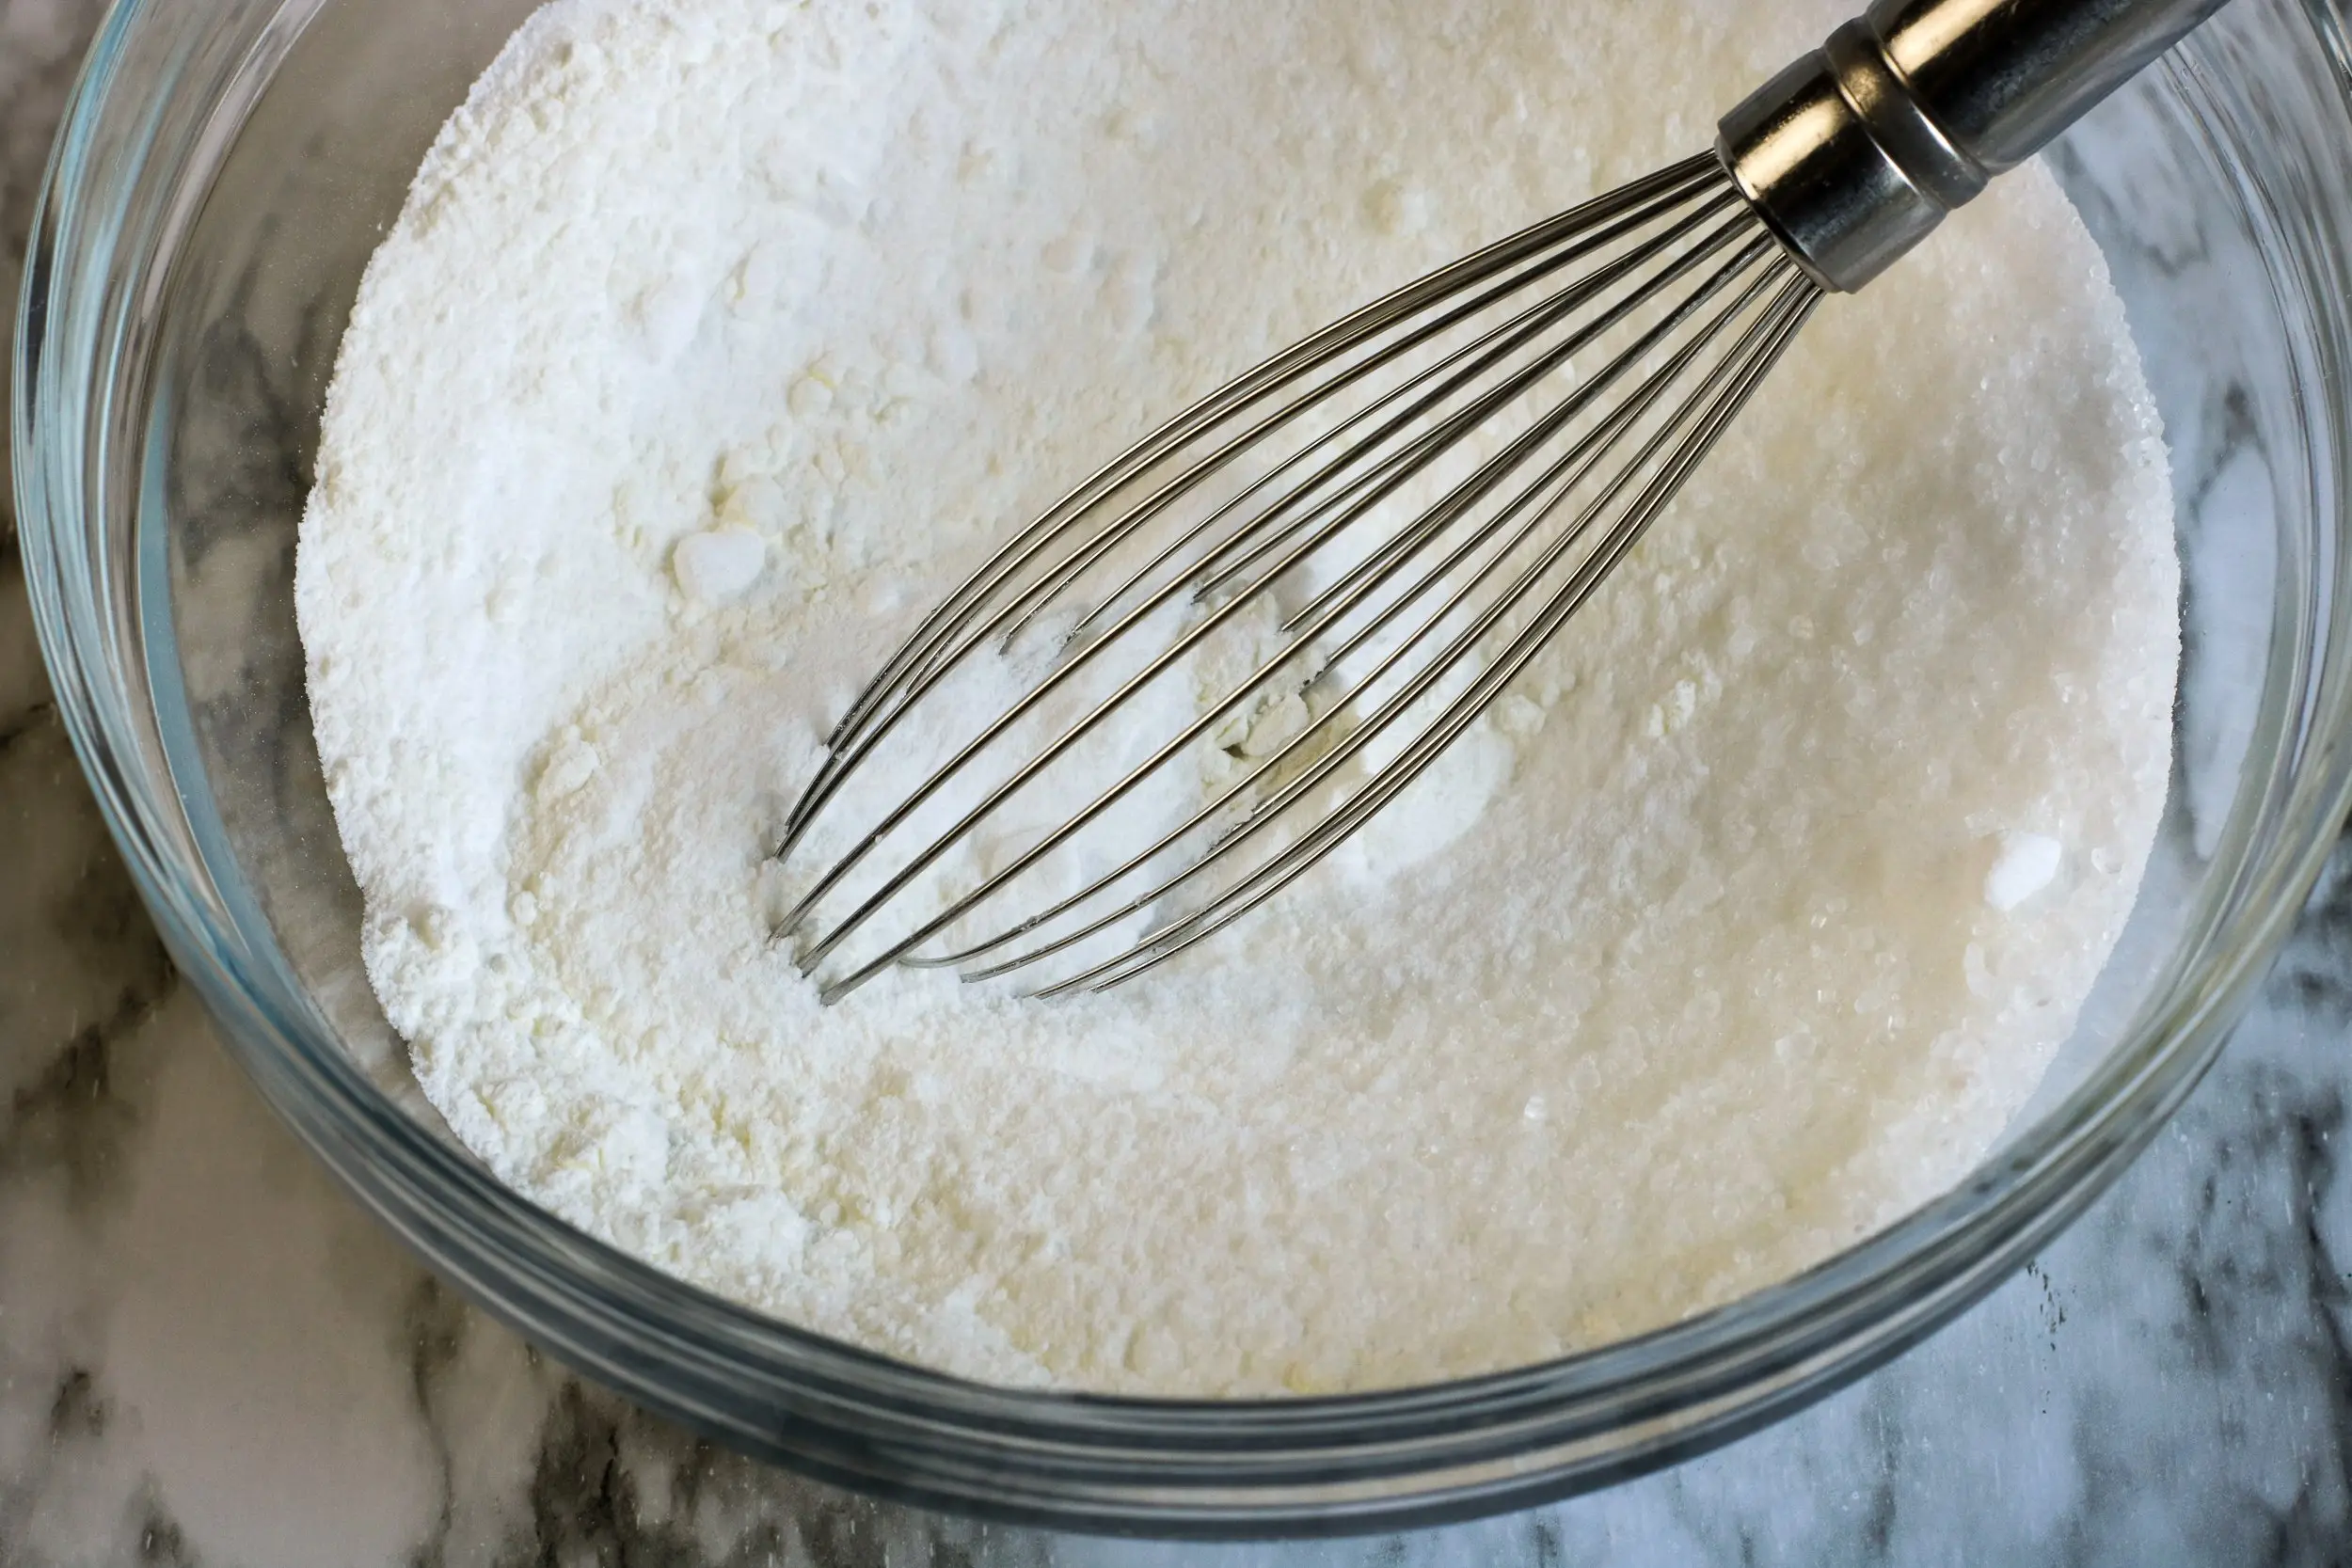
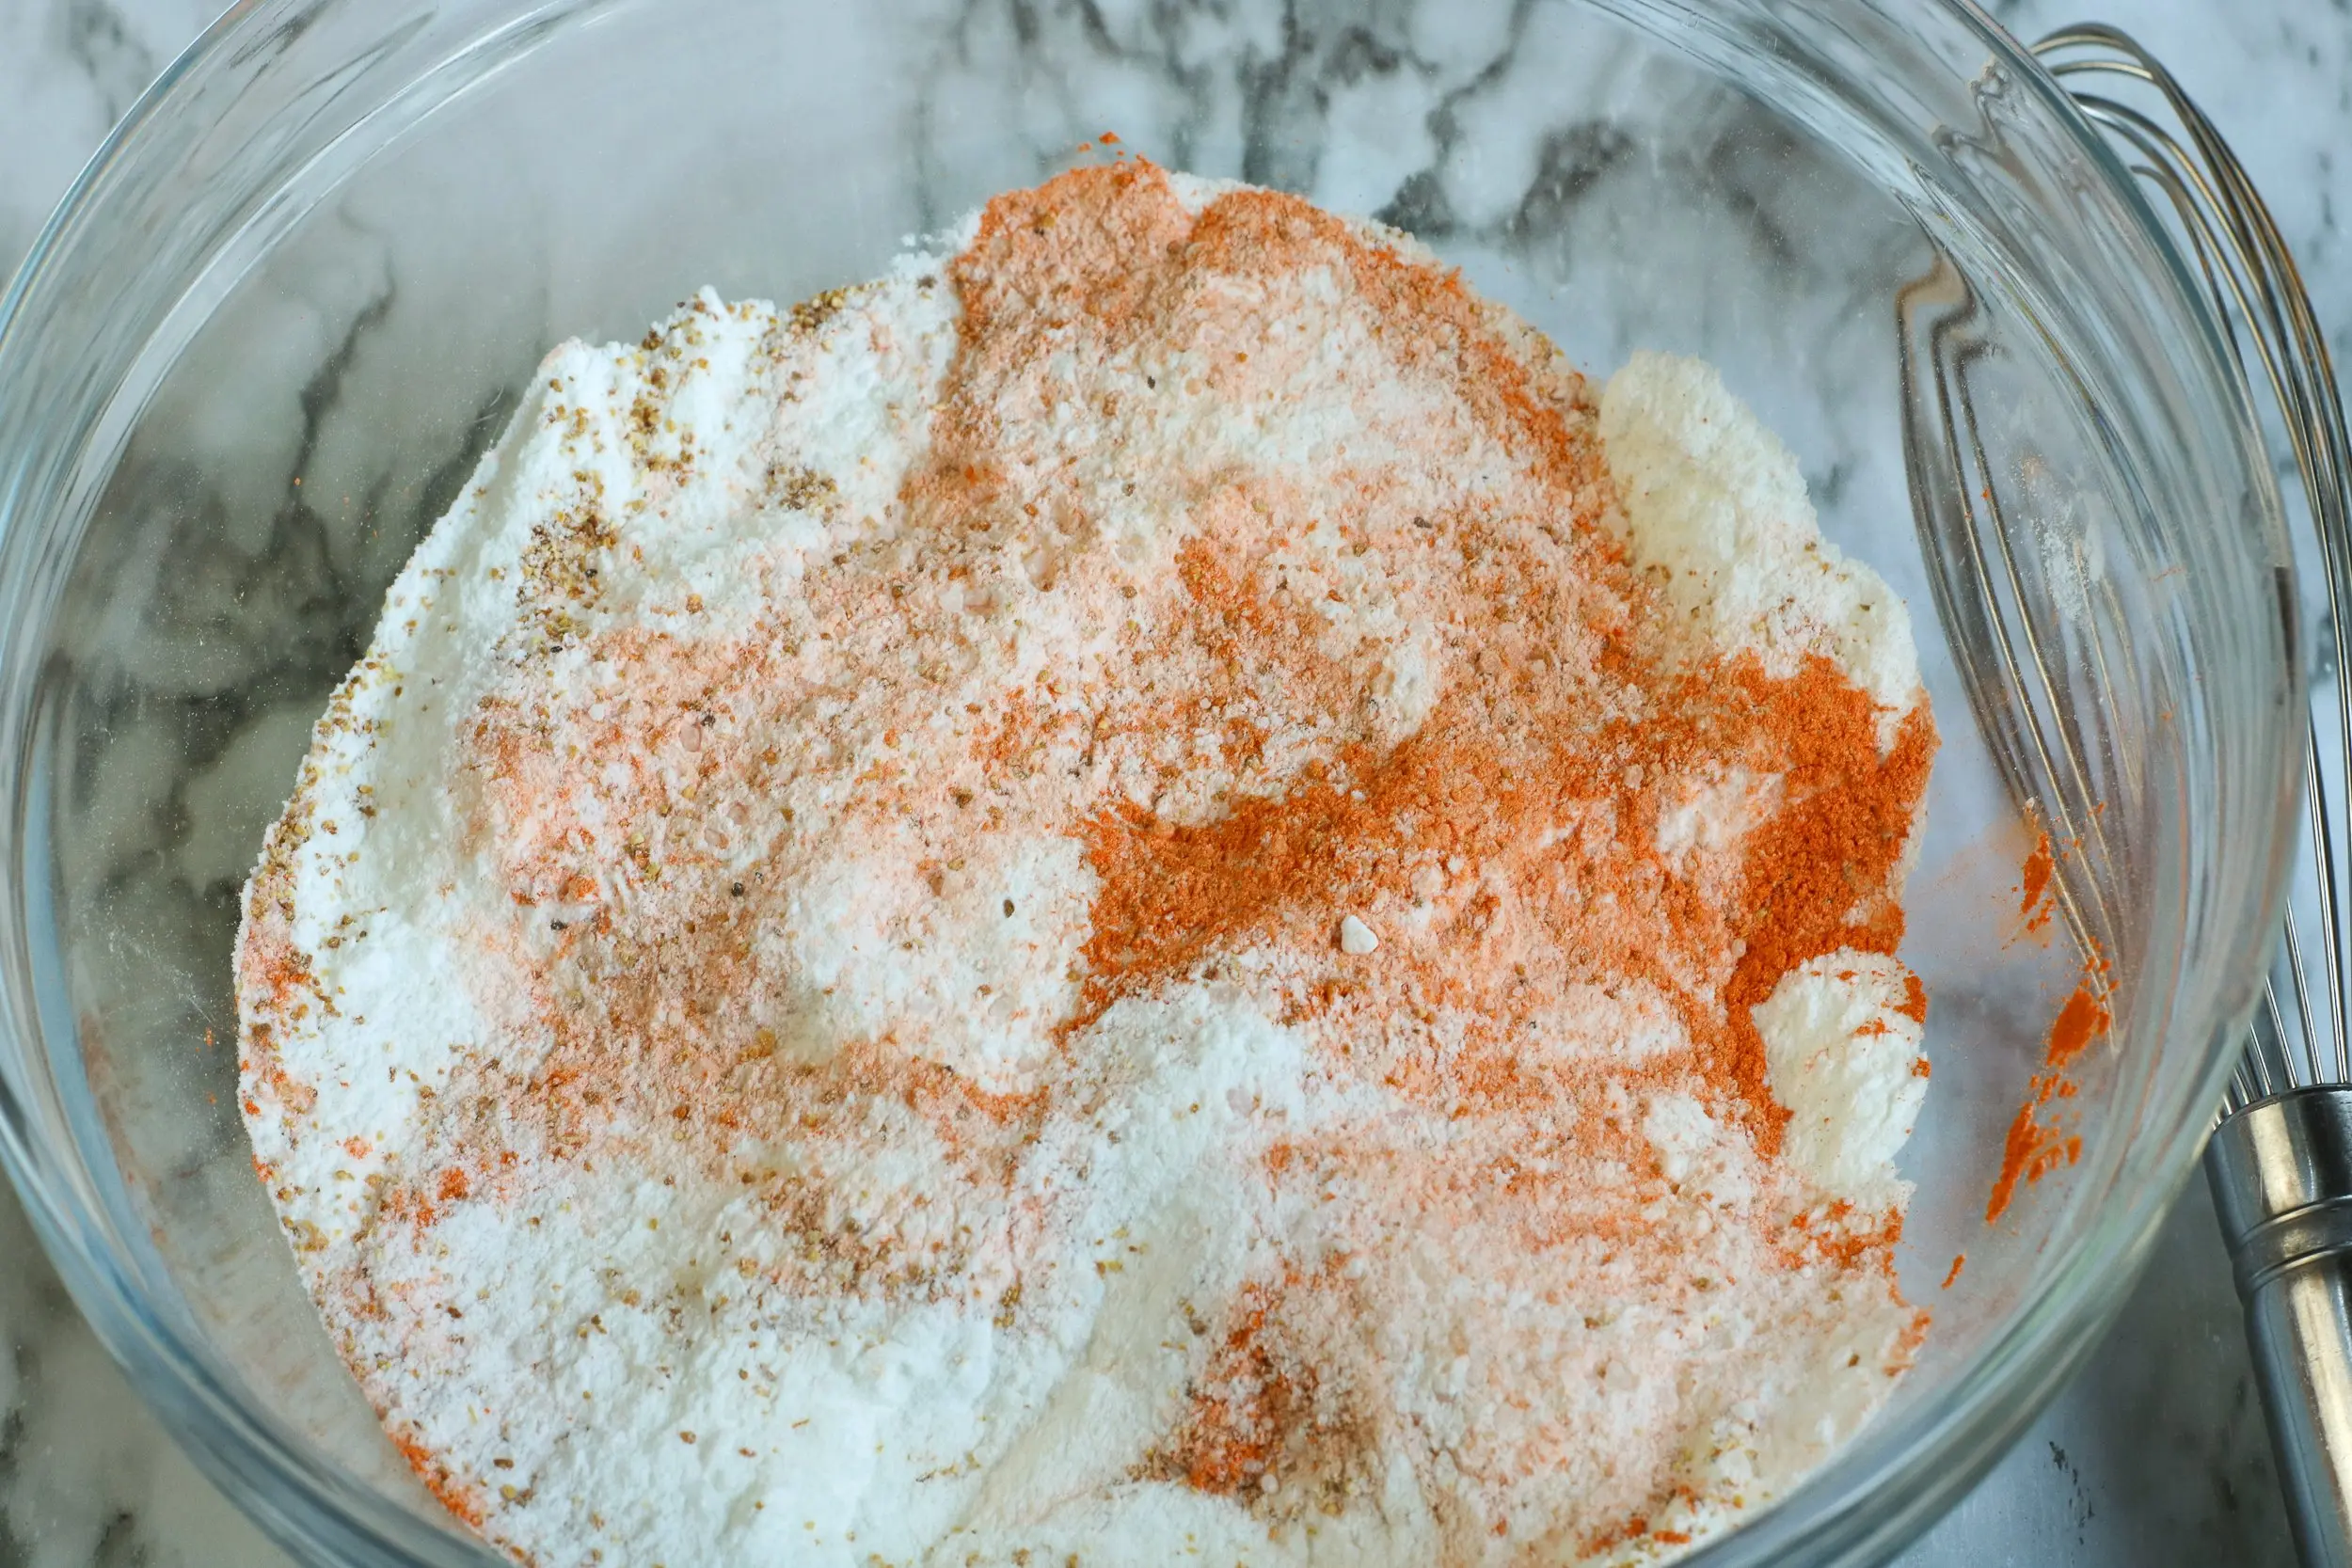
- Combine corn starch, citric acid, baking soda, epsom salt, and mica powder in a large bowl.
- Whisk everything together well to completely combine.
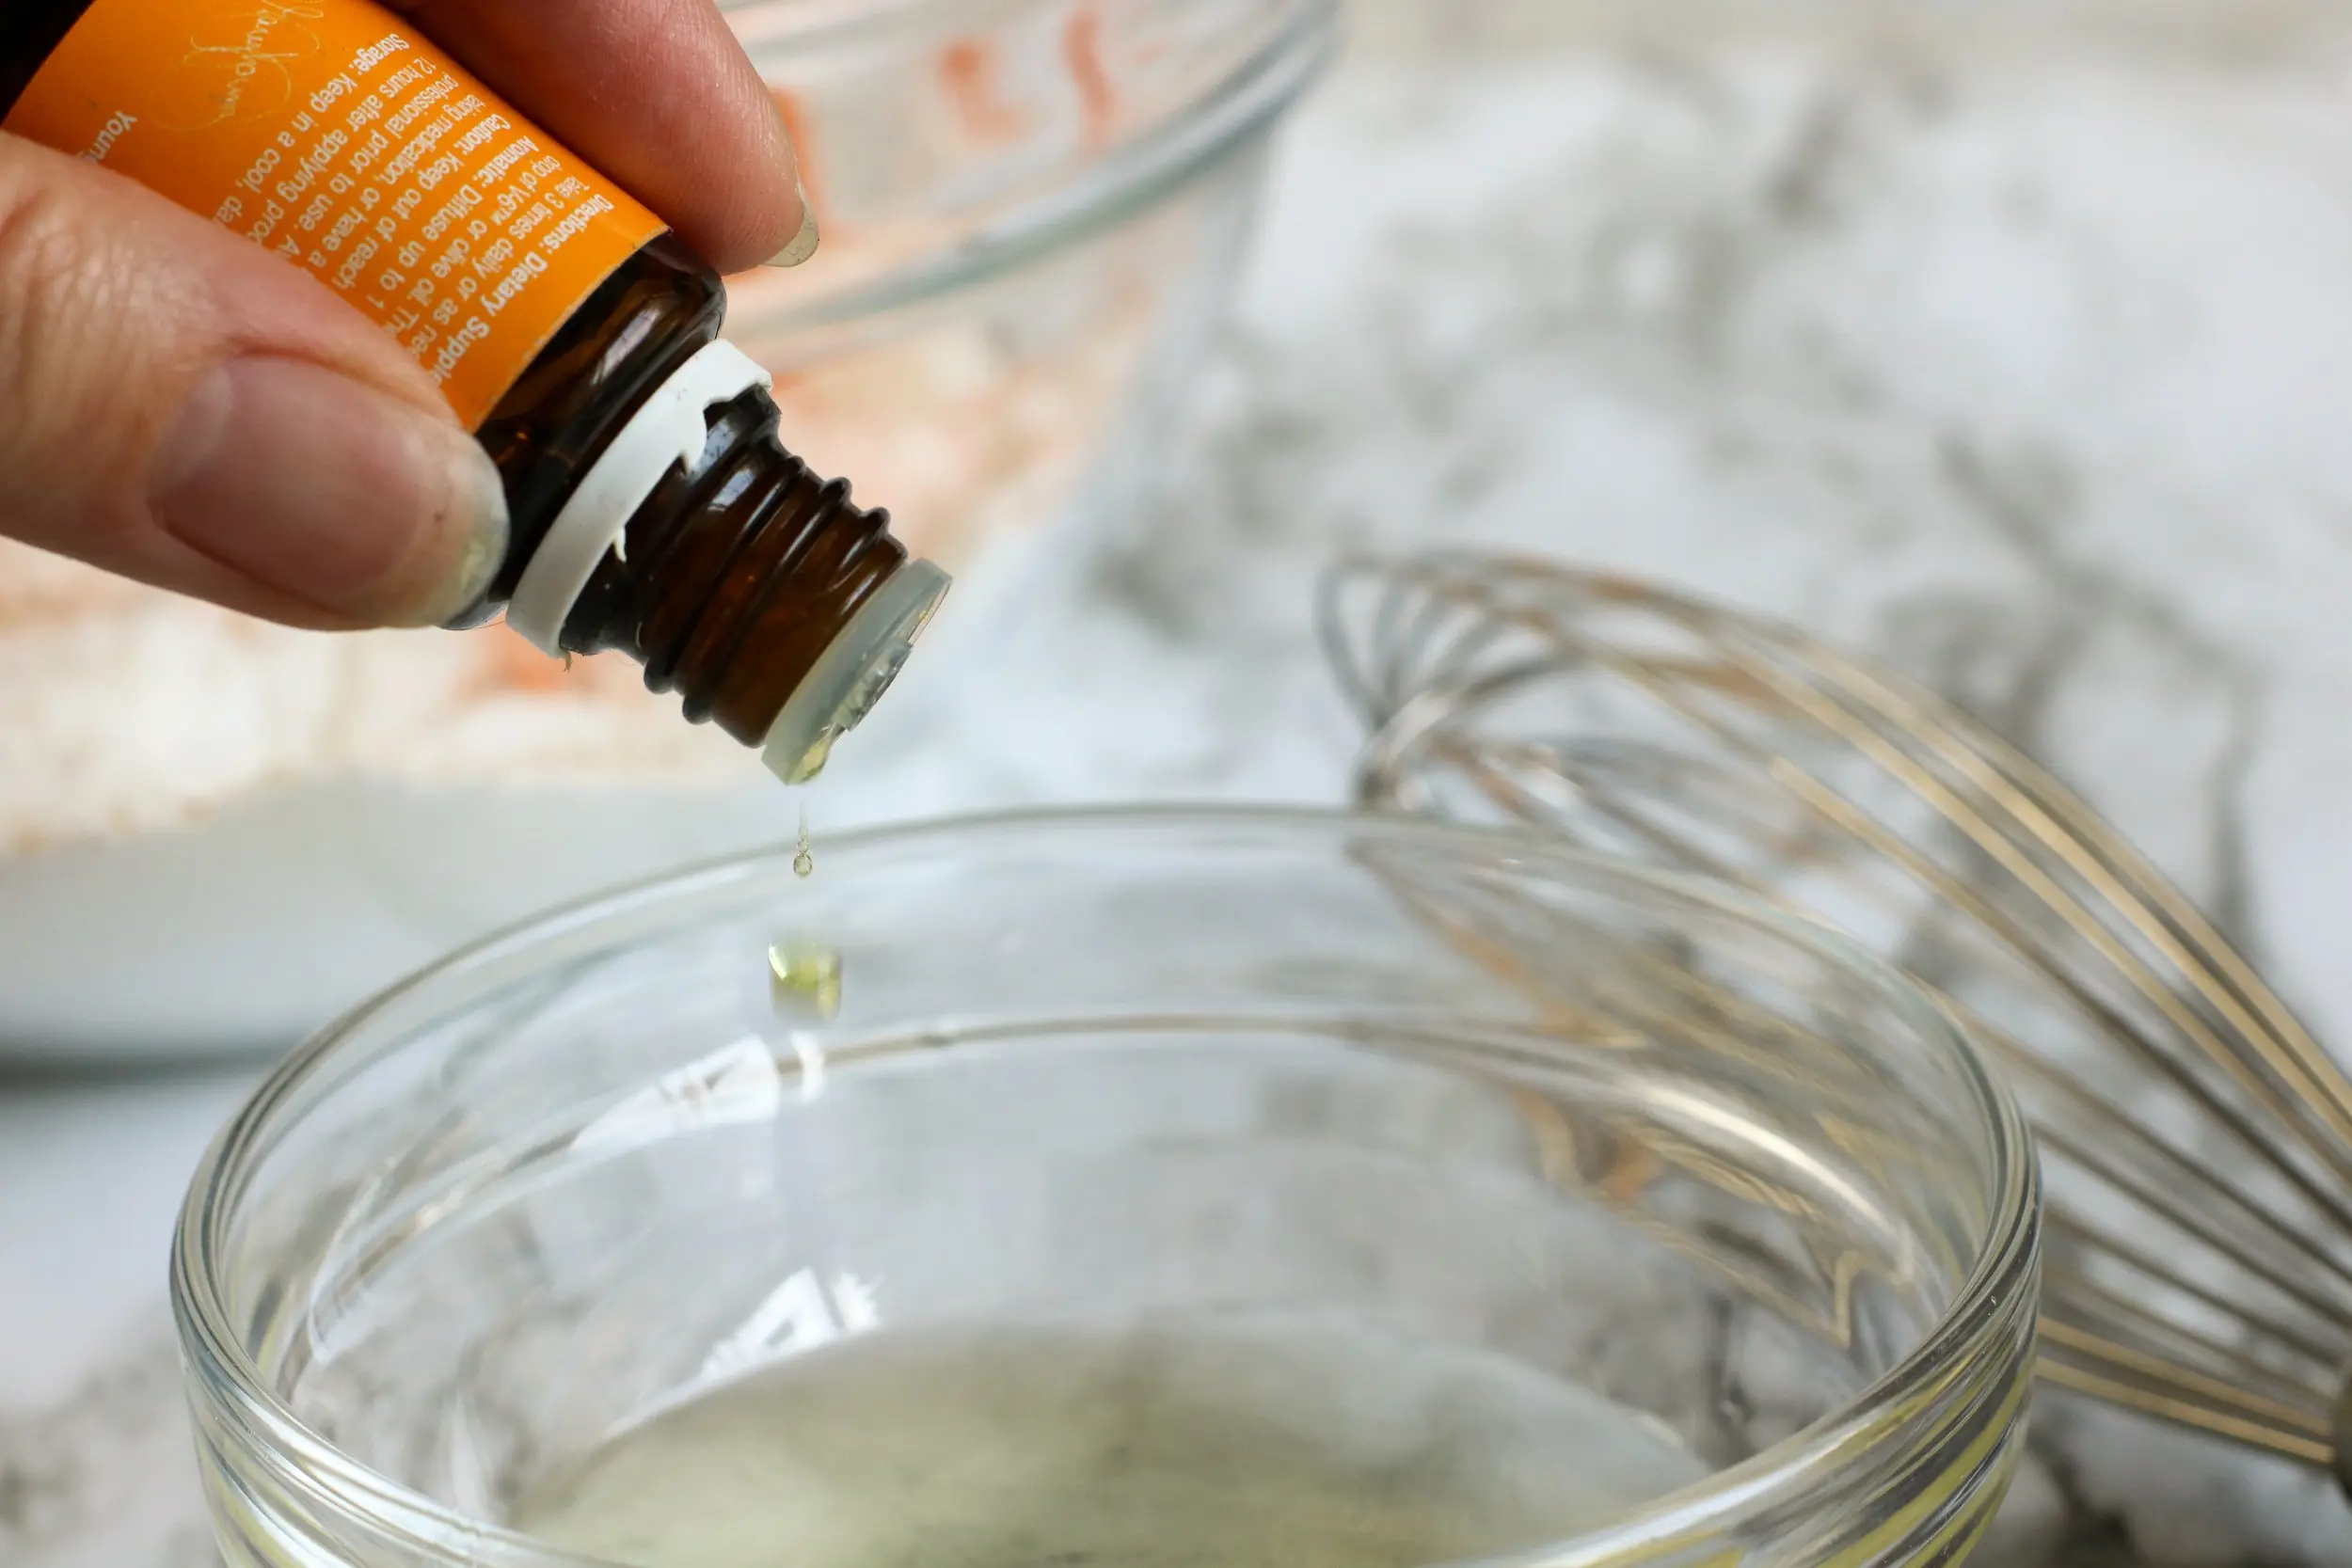
- Combine the melted coconut oil, essential oil and water into a small bowl, whisking well to incorporate.
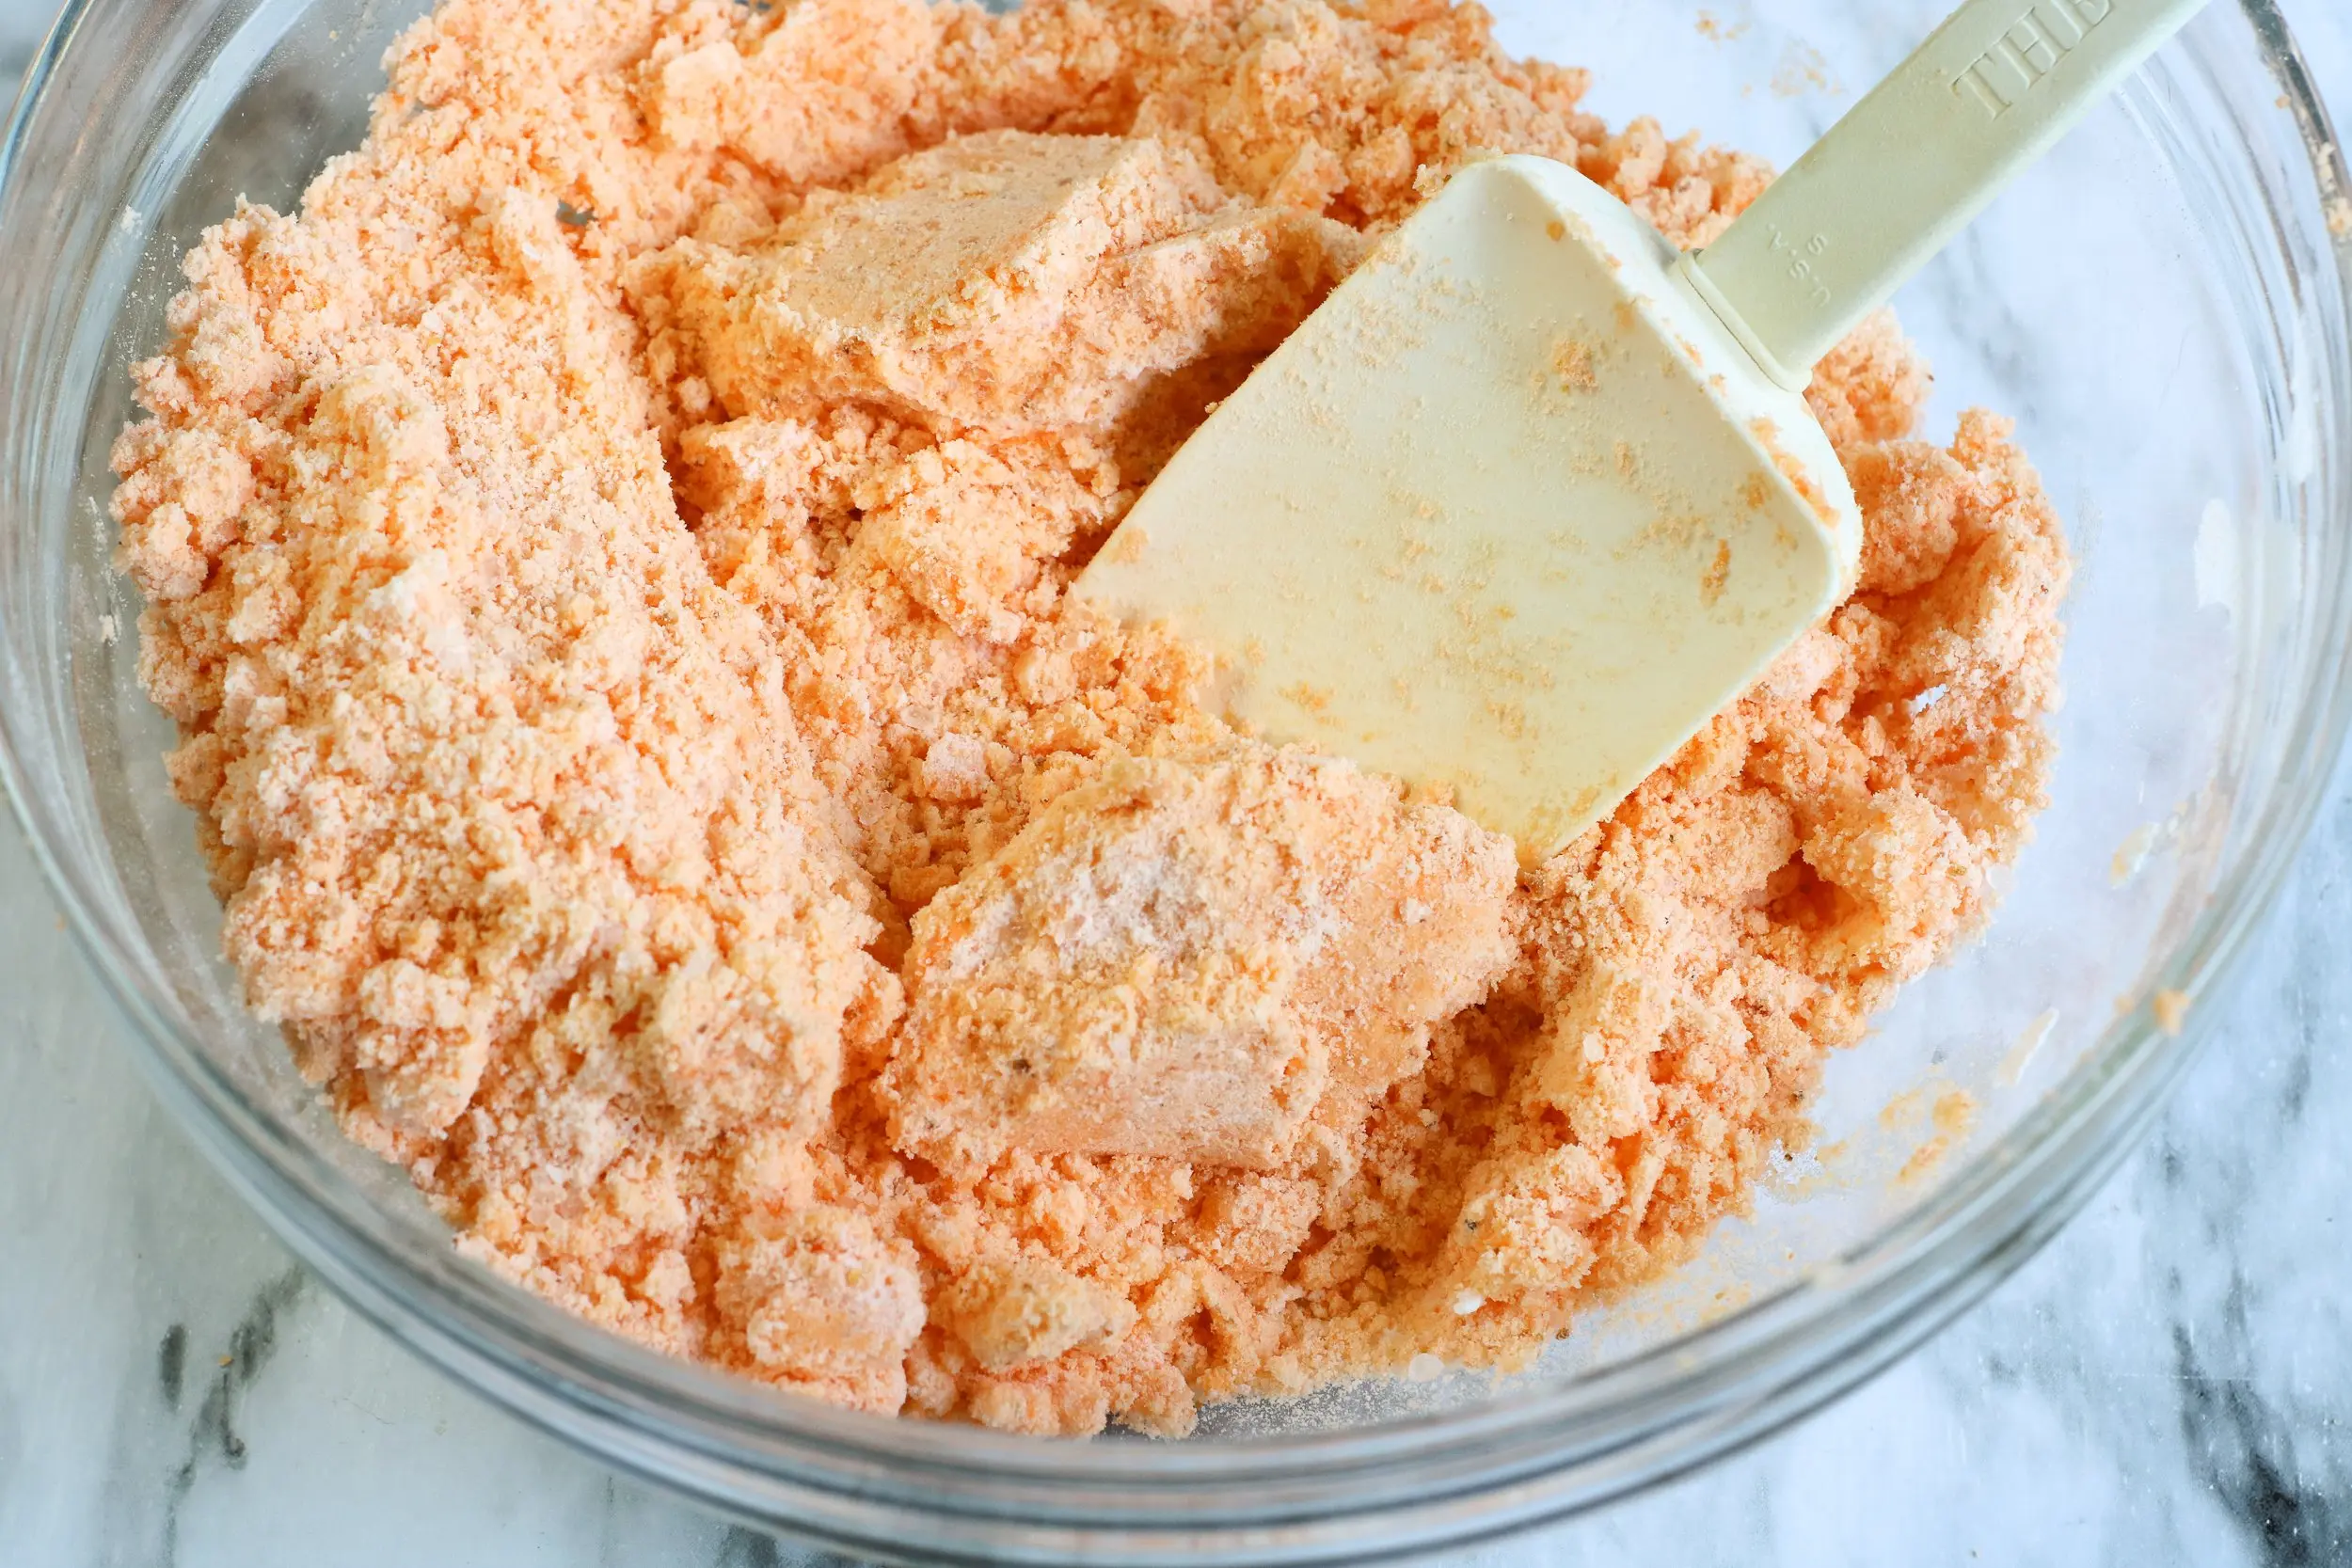
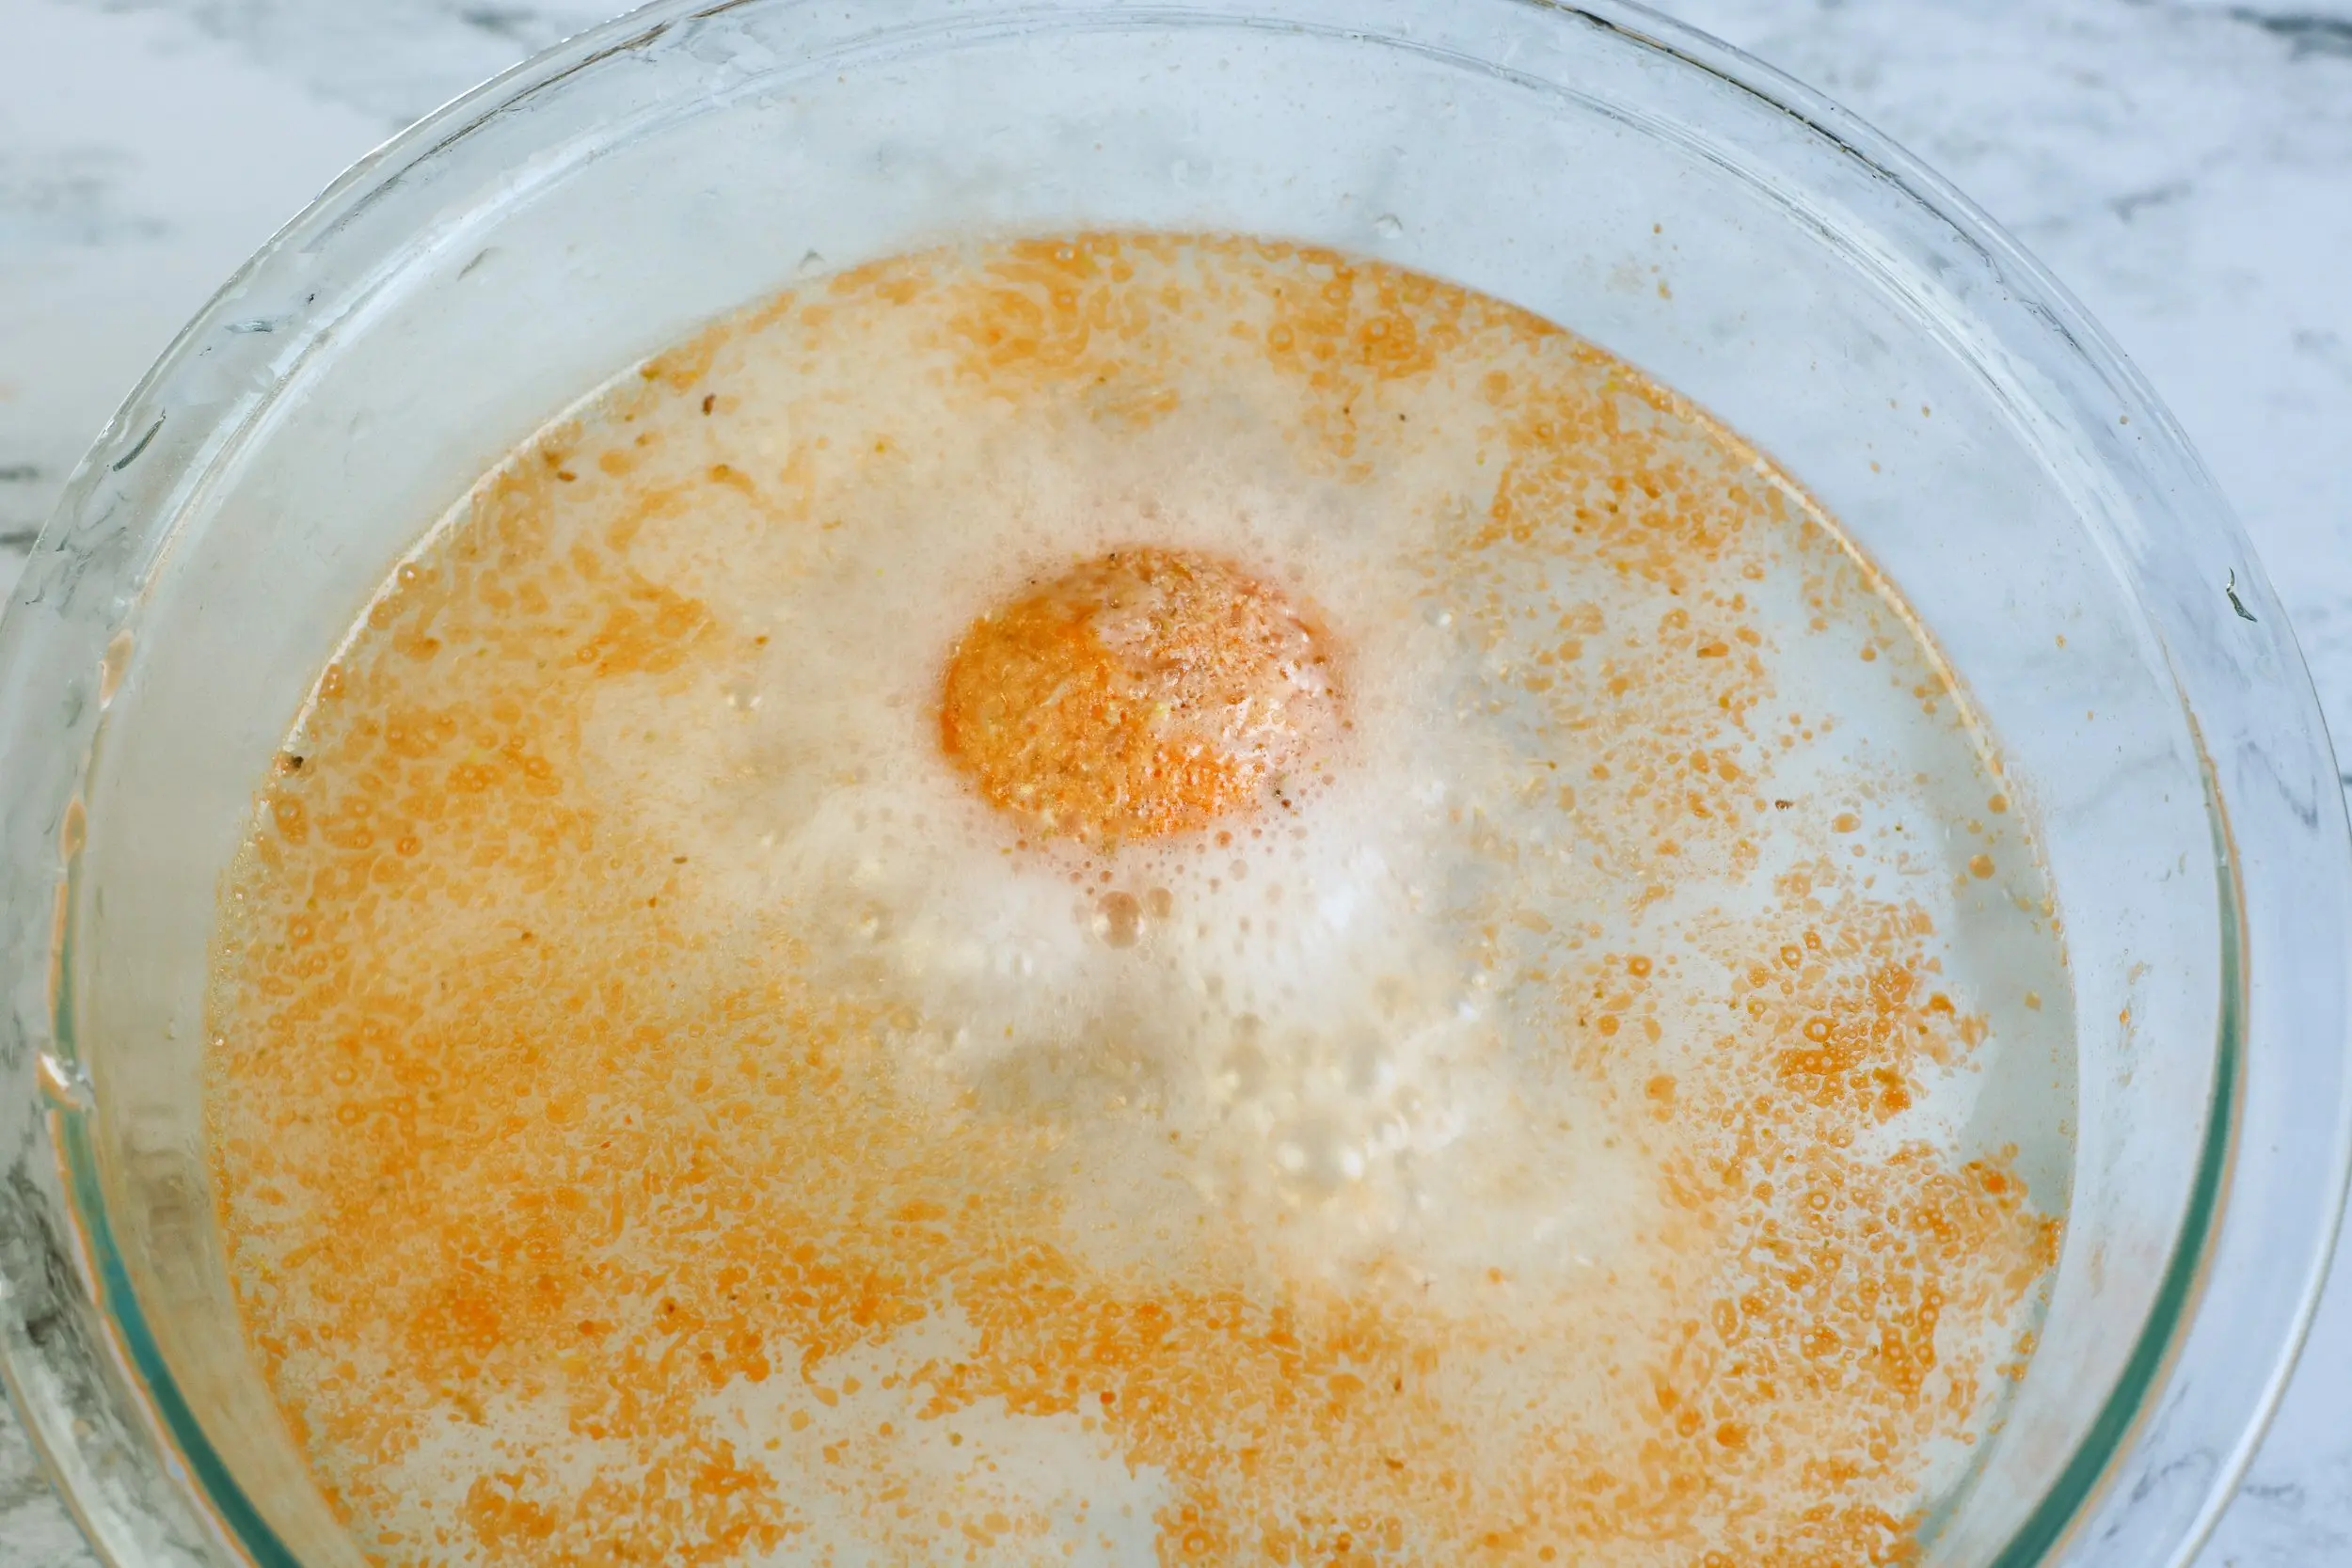
- Slowly (and I mean SLOWLY) pour the oil mixture into the dry mixture so it does not fizz too much. Stir and mash together until completely incorporated and the mixture looks like wet sand.
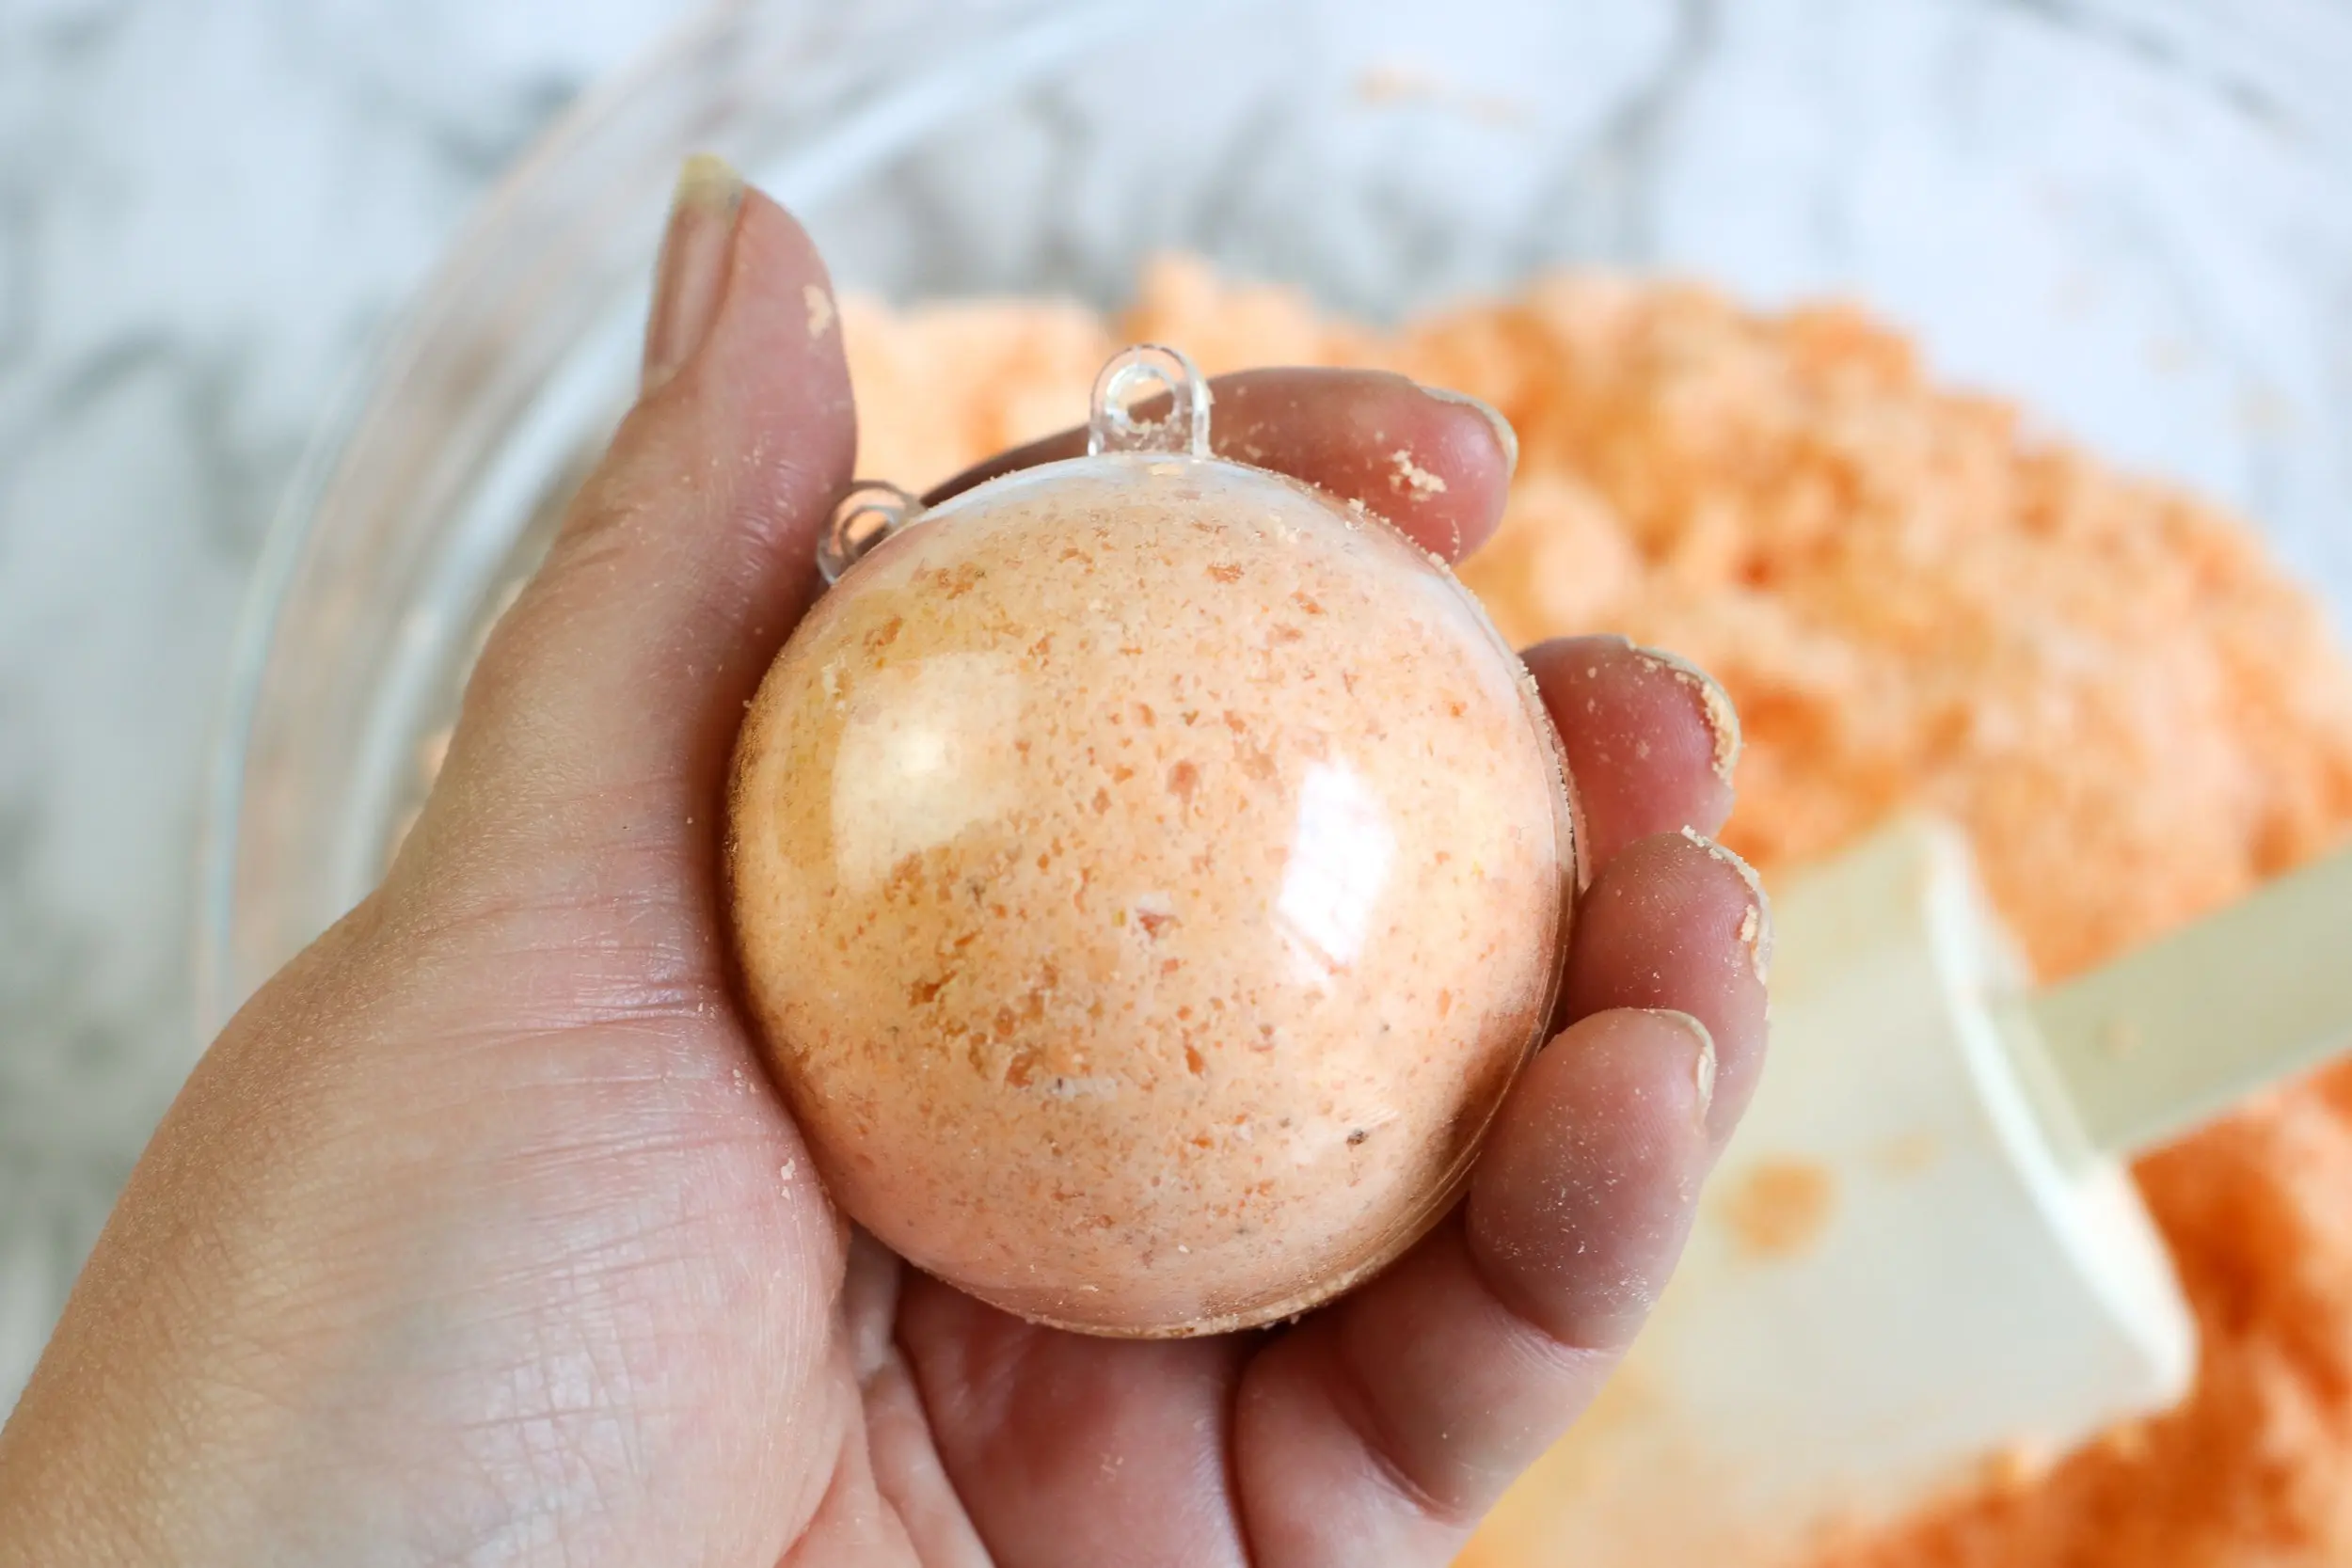
- Press the mixture into the two mold halves, generously packing it in there. At this point, you can even include small toys for a fun surprise for kiddos.
- Twist the two halves together to close, and allow to dry for at least 24 hours.
- To remove your bath bombs from the molds, tap on the outside of the mold and twist to separate.
- Store in an airtight container for up to six months. You can also wrap them in plastic wrap. If you want to get really fancy, you can use shrink wrap sleeves to wrap your bath bombs. Heat them with a blow dryer or heat gun to shrink the wrap around your homemade bath bombs.
- When you’re ready to use the bath bomb, simply drop in water and let it fizz and dissolve. It should take about 30 seconds for it to dissolve completely.
STAY IN TOUCH ON SOCIAL MEDIA – @INSTAGRAM, @FACEBOOK, @PINTEREST
And don’t forget to tag @feastforafraction if you try this recipe!
Frequently Asked Questions
The citric acid, baking soda and corn starch all react with water to provide the fizzing. Epsom salt provides a soothing soak to relieve muscle pain and even constipation. The essential oils provide a relaxing or invigorating scent depending on what you use, and oil moisturizes your skin. It’s like a full spa treatment in one bath bomb.
You can absolutely make this recipe without essential oils or colorants. Just prepare the recipe and leave out those ingredients for an allergy-friendly bath bomb.
The ingredients in this recipe are safe, even for sensitive skin. As with any bath product, you may want to do a patch test to make sure that your child’s skin does not become irritated. This recipe does include Epsom salt which is sometimes used as a soak to relieve constipation, however it is a very small amount in one bath bomb. For kids under 10, I recommend limiting the time in the bath to 20 minutes and do not use bath bombs with kids under 3.
The baking soda and citric acid will react with the liquid when it is added. It is important to add the liquid mixture very slowly so that it doesn’t fizz all at once. Even if it does bubble and fizz, the liquid measurement in this recipe is so small that you will still have a fizzy bath bomb once dried.
Once dried, store your bath bombs in an airtight container so that moisture doesn’t get in. Your bath bombs will last for at least 6 months.
More DIY Projects
- DIY Dry Shampoo
- DIY Clove Mouthwash
- Simple Loofah Soap Recipe
- DIY Clarifying Shampoo
- Homemade Lavender Soap
DIY Bath Bomb Recipe
DIY Bath Bomb Recipe
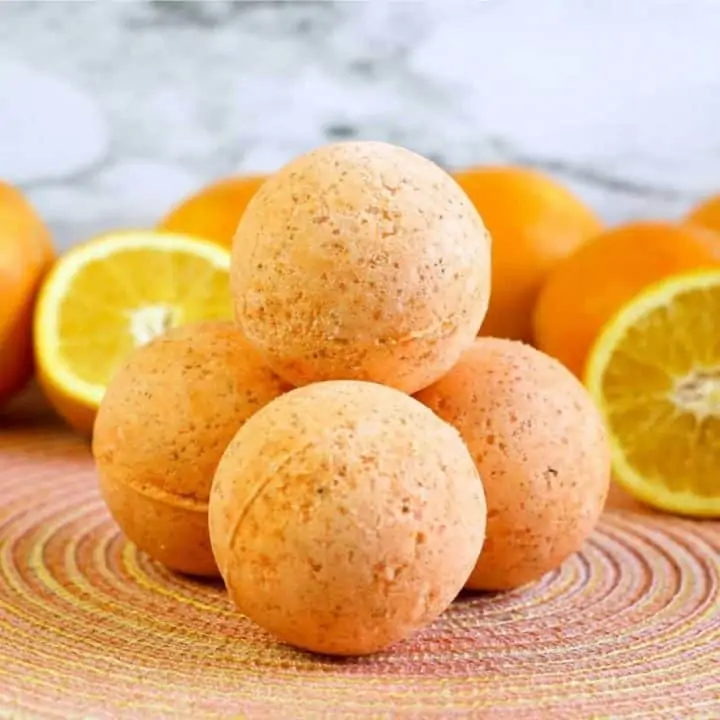
Easy DIY Bath Bombs are a fun craft that kids and adults alike will love to make, and they make a wonderful homemade gift.
Ingredients
- ½ cup Corn starch
- ½ cup Citric acid
- ½ cup Epsom salt
- 1 cup Baking soda
- 1 teaspoon Mica powdered soap dye (optional)
- 1 Tablespoon dried Orange peel
- 10 drops Orange essential oil
- 2 ½ tablespoons coconut oil, melted
- 1 Tablespoon water
- 5 Bath Bomb Molds
Instructions
- In a large bowl, combine corn starch, citric acid, epsom salt, baking soda, mica powder (optional), and dried orange peel. Whisk to incorporate completely.
- In a small bowl or measuring cup, whisk together coconut oil, essential oil, and water.
- Very slowly add the oil mixture to the dry ingredients. Pouring slowly helps make sure the mixture fizzes as little as possible. Mix together until it resembles wet sand and everything in fully incorporated.
- Transfer the bath bomb mixture into bath bomb molds, making sure to press the mixture tightly into each mold half. Overfill a little to ensure that the two pieces stick together when pressed together. Press the mold pieces together and twist until closed.
- Allow the bath bombs to dry for at least 24 hours.
- To remove the bath bombs from the molds, tap the outside of the mold gently and twist each side of the mold and pull apart to remove the bath bomb.
- Store bath bombs in an airtight container or wrap in plastic wrap.
- To use the bath bomb, simply drop it in water and watch it fizz and dissolve.
Notes
Feel free to play with essential oils and mica powder to customize different looks and scents. Lavender essential oil and dried lavender would make a great, calming bath bomb.
For an added treat, you can even press a toy into the middle of the bath bomb before pressing the two halves together. The toy will be revealed when the bath bomb dissolves in water.
Recommended Products
As an Amazon Associate and member of other affiliate programs, I earn from qualifying purchases.


Does this color the bath water? I’m looking for a natural replacement for my kids’ bath color tablets!
Hi, LeeAnn. It does color the water a little bit, but not as much as color tablets. You can always add more mica powder to make the color a little stronger. I think it is a great replacement, though, as kiddos will have fun watching the fizzing. 🙂
I use normal food colouring to colour my kids baths 🙂
How big are each bath bomb from this recipe???
Hi, Rachel. It depends on the size of the mold that you use. The mold I used and linked to are 2.5 inches in diameter.
How many does it make?
Hi, Shannon. This recipe makes approximately (5) 2.5 inch bath bombs. If you are using a smaller mold, you will be able to get more.
Hi. Is the water necessary? And is the alcohol necessary? I only found 70% alcohol.
I’ve seen a recipe for 1Tsp of water for the same amount of dry ingredients. Why does it differ? I’m concerned because my bath bombs have been hit or miss and I don’t know why.
Thank you.
I don’t see alcohol on this list. Is there supposed to be?
Hi, Amber. I chose to use water in this recipe rather than alcohol. You can absolutely use Isopropyl alcohol in place of the water. I found that if the water is added slowly, it doesn’t activate the bubbling and it’s an ingredients more readily available for most people.
Is there any way to incorporate Castille soap to make this a bubble bath bomb?
Hi, do i have fo freeze overnight or let them dry in room temperature? Thanks for your answer
Hi, Selin. These dry at room temperature in the molds. Thanks!
I was wondering do have to use melted coconut oil or can you use already liquid coconut oil in this recipe?
You can use fractionated coconut oil or almond oil. I recommend fractionated coconut oil since this recipe doesn’t include polysorbate 80.
I was wondering if you could use already liquid coconut oil in this recipe instead of melted coconut oil ?
Hi, Larry. I’m sorry for the late response. Yes, you can use liquid coconut oil in this recipe. The dry ingredients will absorb the oil and it won’t affect the finished bath bomb.
Hi, I’m allergic to coconut oil, can I use something else?
Hi, Sharon. You can use an equal measurement of almond oil or even olive oil. Thank you for the great question!
Hey! Is it necessary to add water? I’ve tried this and when I added water the mixture just kept expanding and would ruin the whole thing.
Hi, Linda. The liquid is necessary to dampen the mixture enough for it to stick to itself while drying. You can try Isopropyl alcohol instead of water, or pour the water/oil mixture in very, very slowly, stirring as you add it.
Use witch hazel as the water.
Great option, Grace. Thank you for the comment!
It is absolutely BEST to make a habit of adding the CITRIC ACID LAST, after adding the wet ingredients to dry ingredients. That way you will not activate the citric acid with your wet ingredients! Best order is add wet into dry, mix well, then last step is adding, stirring in citric. citric. Assuming you have a good WET SAND texture needed to make bath bombs, you are ready to mold your mixture now!
Grab a handful, squeeze, drop it from about 8 inches from your bowl. If it stays together, no pieces break off, mixture is good. If it is still a little dry spritz with water or alcohol 1 or 2 times, mix it up, wait a few seconds to let moisture get into mixture, stir it again then squeeze a handful and do drop test again. I hope this helps. Google the question: adding citric acid LAST when making bath bombs. It “is” general concensus for a reason! It stops citric acid from activating prematurely. Good luck.
does this make 5 bath bombs?
Hi, Sam. Using a 2.5 inch mold like what I linked to above will give you approximately 5 bath bombs depending on how well the mixture in packed. If you use a smaller mold, you’ll be able to get more bath bombs. You can even double the recipe if you’d like to yield more.
when you put this in the bath, is it a strong enough smell that it marinates in the room. do you also smell like that when you leave the bath
Hi, Taylor. This bath bomb is very subtle. It contains dried orange zest and a bit of orange essential oil. So, no it won’t permeate the room and you won’t notice a strong lingering smell.
Hi Sarah!Could we use food coloring? Thanks
Hi, Mehar. You can use food coloring in very small quantities. I would use 1-2 drops at a time and keep the color fairly light. You don’t want to use too much that it will stain skin or the bathtub.
To all new bath bomb makers, even if you are just making them for personal, home use for yourself or your children, IF YOU ADD ANY TYPE OF OIL (ie: coconut, jojoba, sweet almond grapeseed etc) OR ANY FRAGRANCE Oil or Essential Oil for SCENT, it is my opion, my strong suggestion that you USE, ADD a small amount POLYSORBATE 80. It is a SAFE, NOT EXPENSIVE worthwhile product to have. Read up on how it works! If you DO NOT use it, your oils/scent oils will float on water, will cause a disgusting oily ring around your tub and tub will be super slippery (fall hazard). Polyurethane 80 helps EMULSIFY so oil and water mix and there will be NO OILY ring around the tub. As known…oil and water don’t mix. Polysorbate 80 mixed into your WET portion, as last wet ingredient added in wets, is best. Try making a small batch each way and you will truly see the great difference.
I absolutely agree about the polysorbate😊😊😊😊
Hi! I am hoping to make this with my students so I am trying to budget and plan ahead. Can you tell me approximately how many this recipe makes?
Oh, sorry! I see that it is 5 molds which are 2.5″ each. Thanks!
when i make bath bombs they inflate me increases what
to do so? thanks
this happened to me too. 🙁
Good stuff
Hello! Could you convert the recipe into grams quantities? (I don’t have the cups)
Thank you!
I really enjoyed making this recipe with my kids. Is it normal that the mica powder floats on the top of the bath with the oil? And then leaves a bit of a ring around the tub? I’ve been finding kind of frustrating to clean after the bath drains.
Hi, Caleb. I haven’t experienced the mica powder floating on top, but I do color and oil residue in the tub afterward that I simply rinse off. Feel free to leave out the mica powder as it is just for color, if you like.
I’ve heard that you can add Polysorbate 80 to the bath bomb mixture to disperse the oils and colorant in the water. It does affect the dry/wet ratios though, so adding the right amount is tricky.
Can you use baby oil ?
Hi, Chella. I haven’t tested this recipe with baby oil, but I don’t see any reason why it wouldn’t work. Let me know how it works if you try it.
How many bath bombs does 1 batch make?
Hi, Keera. I use bath bomb molds that are approximately 2.5 inches in diameter and this recipe makes 5 bath bombs. You can easily double the recipe or use smaller molds to yield more bath bombs.
I use exotic oils to imitate popular perfumes and colognes. Can I do without the orange peel?
Hi, Justin. Yes, you can absolutely leave out the orange peel with no other changes to the recipe necessary. I look forward to hearing how they turn out. 🙂
Hi,
Would this work with silicone shaped molds if pressed firmly into it?
Hi, LJ. Yes, if you press the mixture in firmly and allow to dry completely, it will hold the shape of the silicone mold. Have fun!!
Hi, I tried making these a few days ago, very careful to add the wet mix extremely slowly. I pressed it into silicone moulds firmly and left them to dry, but they expanded badly and when finally dry did not fizz at all.
Is there something I’m doing wrong for it to fail so badly. I made a second batch with the same result too
You have too much water. Try adding less. Just enough to get the mixture to hold together when squeezed. People tend to add too much instead of too little. If you have a humid day, that can affect your liquid amount. I measure in grams.
Di Burga
Wixy Soap
Mica powder completely stained my tub and my kid’s skin. Unfortunately I didn’t test it before making 30 for a birthday party 😭. Use my story as a cautionary tale.
Sarah, you are a kind and patient woman for the fact that you had to answer the question, “How many bombs will this make?” and as many times as you did. (as well as some other 🙄 questions)
I would have had to fight the urge to answer something like, “well, honey, it can make 1 or 1000 depending upon whether your mold is the size of a marble or the size of a cantaloupe.” Also, I guess no one takes a few seconds to ask themselves,
“hmmm, I wonder if someone else has posed this question”
I tip my hat to you, ma’am for sharing this very, very simple to understand, convert, and substitute recipe and for your kind demeanor when answering so many basic questions!
Lol, when I was reading I was thinking she’s very patient and then I seen this comment. It’s crazy because she was very detailed on things to do etc.
I was thinking the same thing when I read all these comments. How many times does she post 5 of 2.5 size. Just saying. Great recipe. Add water a few drops at a time to stop the fizz.
HI there….I am about to endeavor into the world of bath bomb making….I will let you know how they turn out.
Ok….so I dove in, and I did three batches….the first ones expand a little, the second ones blew up, and the third followed suit. Did I add too much water……wondering why when I put the mixture in the mold that it just kept expanding…….yikes! What a mess! Gonna still try and salvage them as I used sandalwood oil, orange oil etc….so it was an expensive mistake….please let me know what I did wrong. Cheers, Deb
Hi, you have to pour the liquid mixture into the dry mixture very very very slowly. I would do it a little at a time and mix . I hope you have gotten some success 😊
does this work for shower steamers? or is it a different recipe?
Can I use this recipe as shower bombs?
Hi, Jacklyn. I’m sorry for the delay in response. These must be completely submerged in water to activate, so they will not work as shower bombs.
Hi someone write a book and took some information that you wrote in this blogue in her book. Your book is in the references. Hope you know because it is a book full of mistake about making bath bomb ..so it can reduce your credibility.
The book is bath bomb the ultimate guide, on amazon
Hi I had to add an extra 1/2 teaspoon of water as didn’t have orange zest but worked out really well! Thank you for this!
Can I use something else instead of the mica powder? For example, tumeric powder, beet root powder or spirulina?
I l ow this is late, but to whomever is going to read it, please don’t use turmeric. It will stain your skin, your tub, towels, anything it touches. Also, it doesn’t wash out. Be careful with natural dyes
Hello, if I wanted to use a fragrance oil instead of essential oil, how much would you recommend I use? Thanks!
I liked the small note that these ingredients are worth stocking because they do more than one job around the house. That keeps the recipe from feeling like a one-time craft I also ended up opening Shoppers Food weekly ad afterward because it carries the same thread a little further.